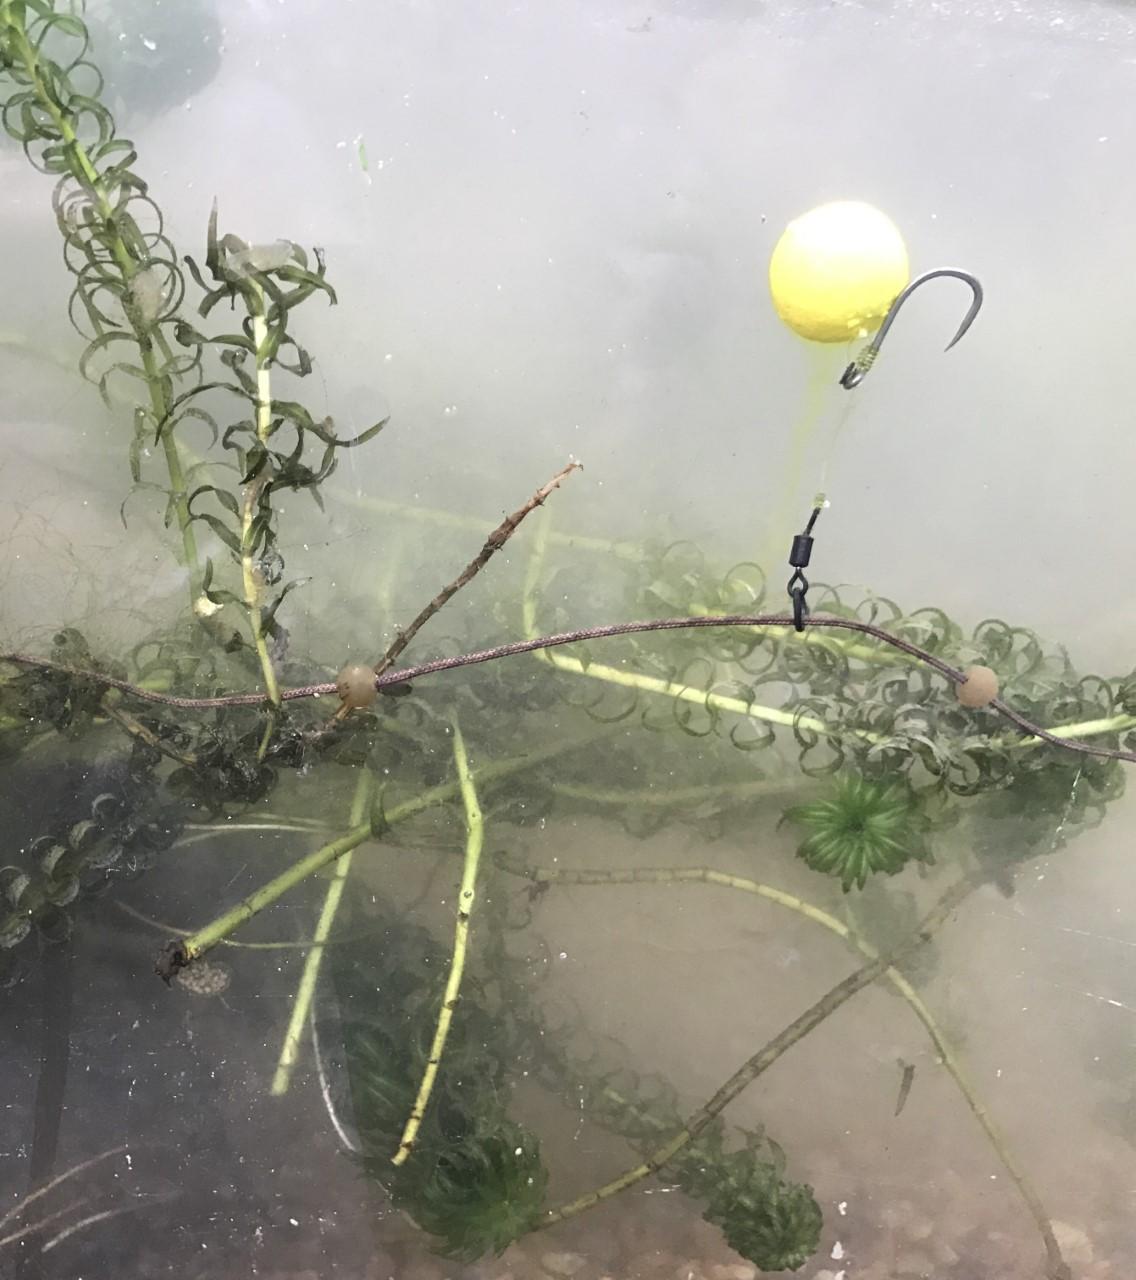
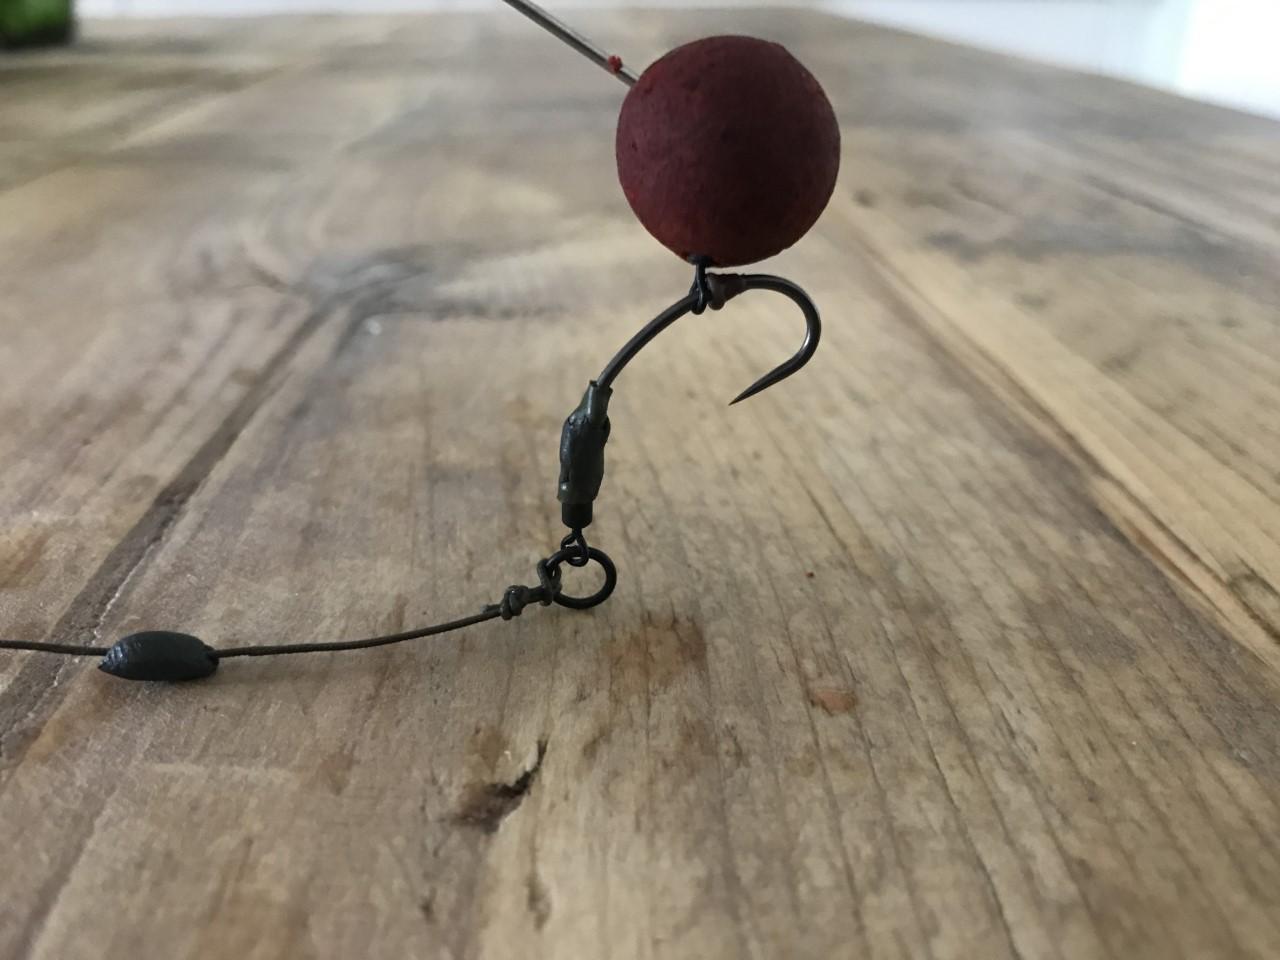
The Ronnie rig has been pivotal in the capture of some of the biggest carp in the UK. It is also used widely by anglers on French carp lakes and across Europe with tremendous success. Its immense hooking properties and ability to reset itself has made it a rig that so many top carp anglers will not be without today. Until fairly recently though, most of us had not even heard of this rig, let alone knew how to tie the ronnie rig. However, when you understand its amazing hooking mechanics it is hardly surprising it was kept a secret.

It is similar to the 360 rig, using a micro rig swivel to attach a pop up boilie to the hook but the increased length of the curved hook shank by utilising the kwik lock swivel and shrink tubing, which pulls straight when to fish is hooked, has meant that the concerns around mouth damage and hooks getting caught the landing net mesh are removed.
The Ronnie rig is essentially a low lying pop up rig, enabling the boilie subtly sit up just off the lake bed making it ideal for when there is not too much weed or debris.
The micro rig swivel allows the boilie to spin 360 degrees off the hook and the curved hook which pivots off the shrink tube and kwik lock swivel enables the rig to also easily rotate. The rig is able to maintain its aggressive hooking position at all times, yet with virtually no chance of tangling. This is what makes the Ronnie rig so brilliant and a rig that is here to stay.
How to Tie the Ronnie Rig
To tie the rig you will need a size 4 or 6 curved shank hook, a micro rig swivel and hook stop, kwik lock rig swivel, shrink tubing, bait floss and your chosen hook link material.
Step 1
Cut a piece of shrink tube about half an inch in length and slide it over the eye of the curve shank hook.


Step 2
Take a kwik lock swivel and opening the crook slightly to pass the swivel through the eye of the hook

Step 3
Use a pair of plyers to push to crook back into position.

Step 4
Push the shrink tube down the shank of the hook, over the hook eye and over the barrel of the kwick lock swivel.

Step 5
Next steam the shrink tube over a kettle to fix the shrink tube in place

Step 6
Slide the micro rig swivel onto the hook

Step 7
Push the rubber stopper onto the hook which ensures the rig swivel stays on the hook and gives the hook additional movement which helps with the hooking mechanics when the carp picks up the bait.


Step 8
Attached a pop up boilie to the micro rig swivel using bait floss and secure the boilie by blobbing the bait floss down with a lighter.

Step 9
To perfectly balance the rig take some rig putty and carefully mould it around the shrink tube until to rig slowly sinks with the hook sat up off the lake bed

Step 10
Finally attach the rig to your hook link material and cast to you chosen area.


